By Matt Fussell
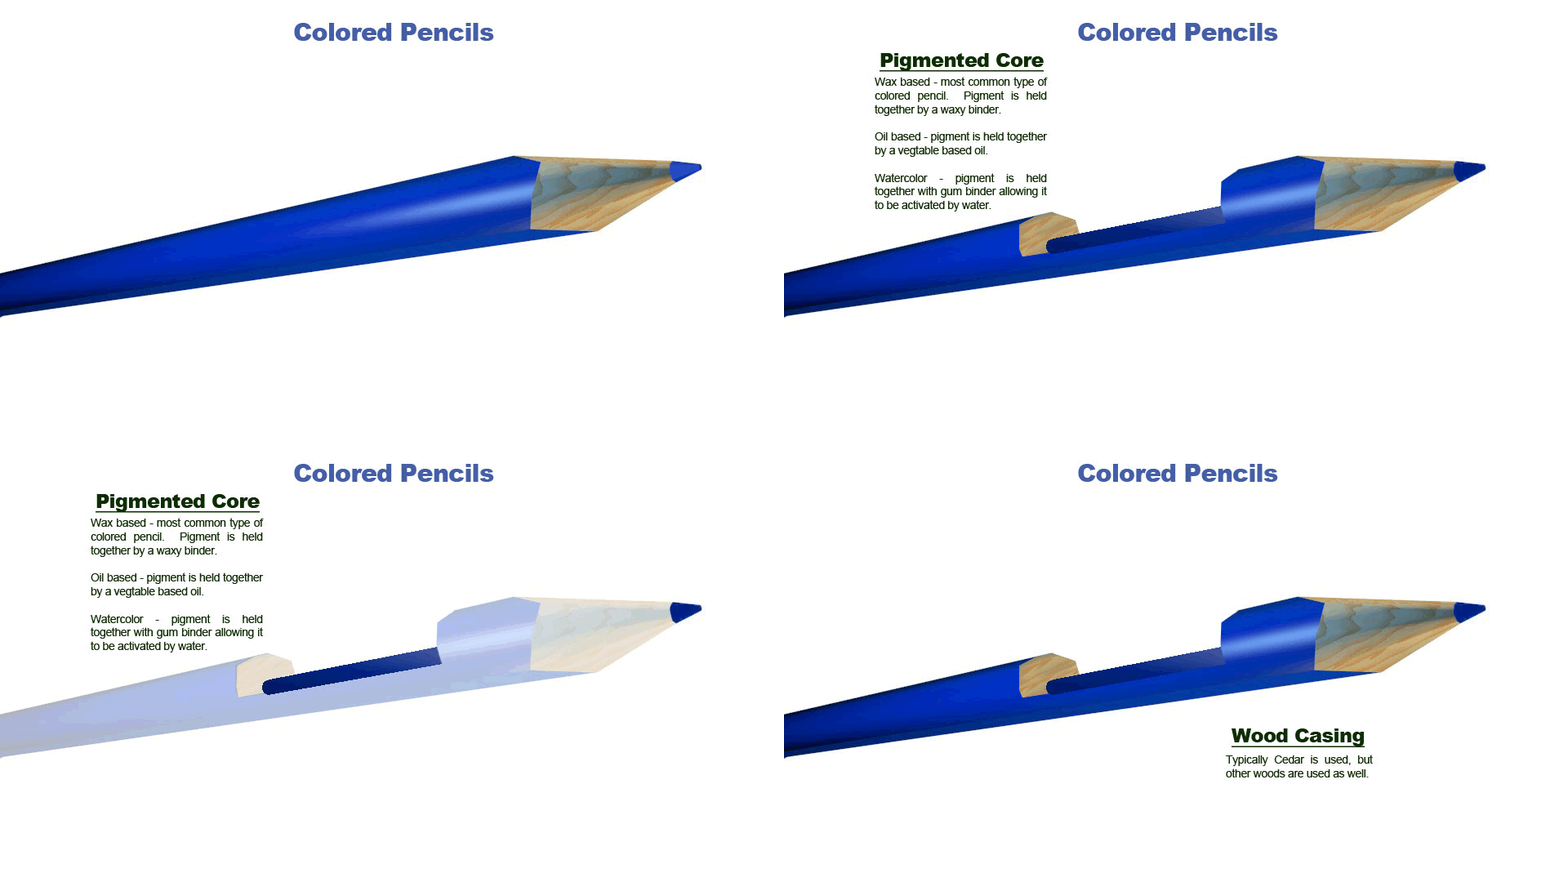
Colored pencils consist of a wooden shaft that is filled with colored pigment. This pigment is held together by a binder, that when spread over a surface, transfers color.
Colored pencils, as a medium, are a popular choice for many artists. This is partly because they are so widely available, portable, and relatively inexpensive. When used correctly, colored pencil drawings can be rich with color and resemble a painting.
Let's take a look at each part...

The center of the pencil is a pigmented core that is held together by a binder. The binder of the pencil affects how it performs on a surface. Most pencils feature a wax-based binder, while others are oil-based, or gum-based (watercolor pencils).
Waxy binders are easily layered and can be built up on the surface with ease. The core of these pencils is easily broken, so care should be taken not to drop the pencils. Burnishing is easily accomplished with wax-based pencils allowing for blending and mixing of colors on the the surface.
Oil-based pencils typically have a stronger core and resist breaking. These pencils are obviously water-resistant. They behave in a slightly different manner than their wax-based counterparts. Layering and mixing is easily accomplished, but I have found that the wax-based binders perform better.
Gum-based binders are found in watercolor pencils. This type of pencil is so different from a traditional colored pencil, that I hesitate including it on this page. The material inside of the core of the pencil is activated once water comes in contact with the material. The techniques used for watercolor pencils are very different than those used for traditional colored pencils. You can check out watercolor pencil techniques here.
The wooden shaft that holds the pigmented core is typically made of cedar wood. Cheaper varieties of pencil substitute less expensive woods. Some brands feature hexagonal grips, while others are round.
If you are looking for tutorials on drawing with colored pencils, be sure to check out this page. Or you can check out the new colored pencil course. (Access to the course requires membership.)
Here's a quick look at excerpts from a recorded Live Lesson that will give you a snap shot on colored pencil usage...
Here are a couple more that are not found on the tutorials page...
Colored Pencil Demo #1 "Apple"-Part 1
Oops this video has moved to Colored Pencil Drawing of an Apple
Colored Pencil Demo #2- "Eye" Part 1
Oops this video has moved to How to Use Colored Pencils Eye Demonstration
There are several ways colored pencils can be used correctly. I most commonly see students use them incorrectly. When used correctly, colored pencils can give the effect of a fully colored painting. (See my colored pencil work.) The following guide will help you use colored pencils in a way that is most successful.
TIP #1-" Color Heavy"- or at least build up your color gradually so that the colors are intense and complex. Don't rely on the value of your paper to make your tints and shades.
TIP #2- "Layer Your Colors"- Build up many layers of your colors. Do not rely on just one application of color to bring you success. Building up and layering your colors will make your colors more complex and realistic.
TIP #3-"Mix Your Colors"- When using any colored medium, you should ALWAYS mix colors. Colored pencils are no different. For example, if you are drawing grass, don't just grab that manufactured green. Instead use blue and yellow, and green.
TIP #4- "Outline Last"- If you like to outline, wait and do it when you are finished drawing the object. Colored pencils can overlap themselves very easily, enabling you to outline objects last. (Don't use black to outline)
TIP #5- "Take Your Time"- Colored Pencils are a medium that demands time. You must work deliberately. It takes time to craft a well-drawn colored pencil image.
TIP#6- "Burnish"- By taking a white colored pencil or a colorless blender, smooth the colors and values out to make a consistent texture and solid finish.
You can pretty much use colored pencils on any surface that will accept them. You can be very creative with this. Traditional surfaces include drawing papers, colored papers, cardboard, tag board, illustration board, rag paper, and watercolor paper. Buy bristol paper at discount
It is important to pay attention to the tooth, or texture of the paper, when choosing your surface. The texture of the paper plays a huge role in how the colored pencils look on the surface. Experiment and find out what papers work best for your needs. I have found that I prefer coldpress illustration board. Illustration board provides a solid and sturdy surface to work on as well a smooth to medium tooth to accept multiple layers of colored pencil.
There are many, many brands of colored pencils. Some are obviously better than others. If you are just starting out using colored pencils, I would suggest buying cheaper brands like Crayola and work your way up to more pricier, higher quality brands like Prismacolor. Prismacolor, in my opinion, are clearly the best colored pencils around. They are very soft, and the pigment is concentrated. There are student grade Prismacolor pencils that are cheaper than the professional ones.
Here are some more art lessons that you may like...