
By Matt Fussell
Many people make mistakes when drawing faces because they don't fully understand facial proportions. Proportion refers to the relationship in size and placement between one object and another.
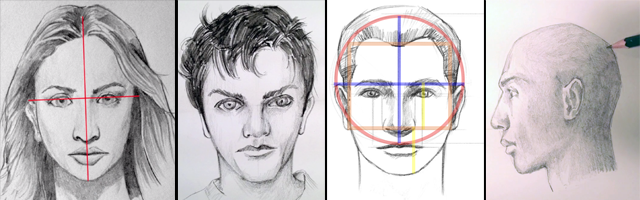
There are many formulas that one can adapt to draw the facial features in the correct location. There's a simple approach - one that I first learned and is great for beginners. Then there is the more complex approach using illustrator, Andre Loomis's guidelines.
We'll first discuss Loomis's approach, which is more complex, but more accurate. If you find that this approach is a bit difficult for you, you can skip to the simpler approach further down the page. Remember, either way, the goal is to create a convincing head so either approach you take is fine.
Andrew Loomis is revered for his step by step approach to drawing heads
. His approach divides the head into manageable geometric shapes. Each feature on the face has a specific location relative to the geometric configuration set up in the early stages of the drawing process. Because this method is so accurate, it's great to use for drawing a head from imagination.
In the following video, we'll take a look at an adapted approach to drawing a head using Loomis's configuration. This is a simplified version of his method as outlined in his book
.

Using Loomis's approach, the head is divided by geometric configurations. A circle is drawn first (indicated in red in the image below) and then divided evenly with a vertical and horizontal line (blue). The edges of the face, the brow line, and the nose line are all defined by drawing a square (orange). An ellipse is drawn instead of a square from any other view other than the frontal or profile views.
The length of the face is determined by the distance from the brow line to the nose line. This distance is extended down from the nose line to find the location of the chin (yellow). So, the distance from the brow line to the nose line is the same distance from the nose line to the chin. The jaw connects to the head at the center intersection of the square or the ellipse - depending on the view.
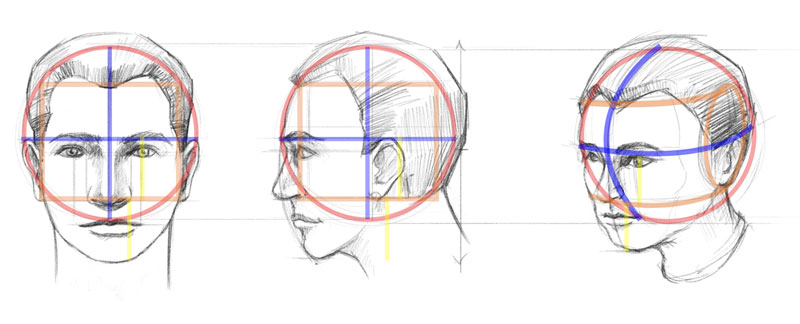 The ears begin on the eye line and extend up to the brow line and connect back to the head on the nose line. They are aligned with the center vertical line (blue) drawn in the second step.
For more on the Loomis method, you can check out his book here
.
The Loomis method can be applied to drawing a head from observation as well, but some find it a bit cumbersome. Luckily, there is a simpler approach. This formula should be used to help you see and compare. In each stage of the formula, analyze each feature and draw what you see. The result will be a representational portrait of the person you are drawing with all of the features in the right place.

Drawing a portrait is very much like drawing any other subject matter. You have to closely observe the subject in order to draw it accurately. Of course portrait drawing is especially delicate because the goal is to make the portrait resemble the subject closely.
If you know the person, the pressure to produce accuracy can be daunting. But every artist, no matter what their skill level should take heart. Even the most experienced and well-known portrait artists are presented with challenges. Consider these two quotes from one of the best portrait painters of all time, John Singer Sargent...
“Every time I paint a portrait, I lose a friend.”
“A portrait is a painting in which something is wrong with the mouth.”
 I bet you that most of us can relate to both of these quotes. We’ve all felt the pressure when drawing or painting a portrait to make it look exactly like our subject. Especially when that subject is a friend. For some of us, the pressure is so great, we avoid portraits all together.
It’s often hard to pinpoint a problem in a portrait. We can see that something isn’t quite right, but finding the solution or the fix can really throw some of us. Often it’s a combination of issues that lead to a less than perfect portrait. Maybe something “is wrong with the mouth”.
Even though representational portrait drawing is reliant on good observation and accurate mark-making, we can still follow a simple procedure that will lead to better results in our attempts.
Using this simpler approach, the first step is to draw a circle to represent the cranium. Next, a line can be drawn to determine the length of the face. For most faces, this line should be approximately double the length of the original circle. Next, lines are drawn from the bottom of that line to the edges of the circle creating the shape of the face.
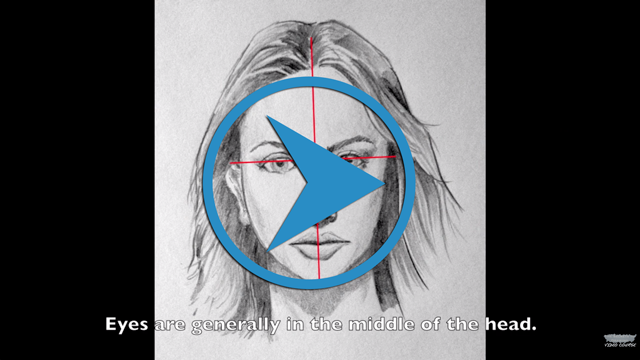
The "eye" line is in the middle of the face. (Your eyes aren't way up on your forehead, so resist the temptation to put them there.)
Five "eyes" make up the width of a typical human face. Obviously, people only have two eyes. The "five eyes" just helps determine the width of the face.
The "nose" line is found in the middle of the "eye" line and the bottom of the chin. When it comes to facial proportion, most noses will end at this line.
However, there are exceptions to every rule. Some people have really long noses and some have really short ones.
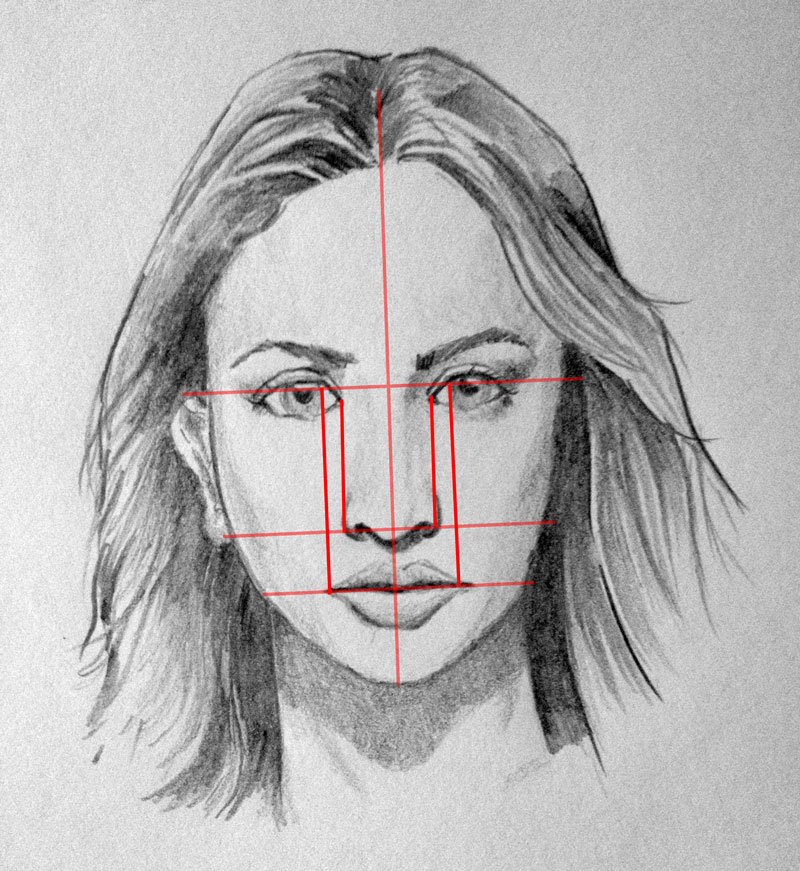
The corners of the inside of the eyes generally line up with the edges of the nose.
The "mouth" line is in the middle of the "nose" line and the bottom of the chin. This line represents where the top lip meets the bottom lip.
The pupils of the eyes generally line up with the corners of the mouth.
The ears are usually found between the "eye" line and the "nose" line.
When drawing faces, use these standards to help you get your facial proportions correct. Remember, you must look and study your subject. While these standards apply to most of us, they do not apply to all of us.
Here's an older video that outlines this simpler approach...
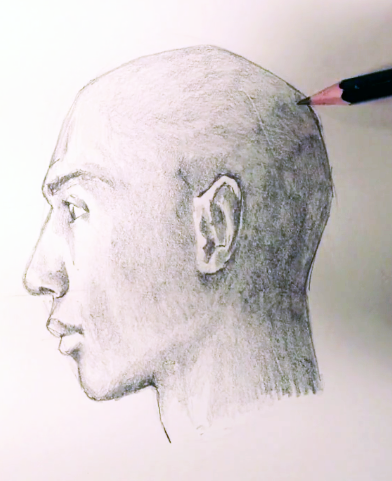
Portrait drawing is an important skill for any artist to know how to do. Drawing the face from the front view is one thing, but drawing the face from the side - or in profile view, is slightly different. One thing that is important in both types of drawing is understanding the proportions of a human face.
A side view pose follows the same steps as the front view, so the drawing may begin with a simple circle. This circle will represent the cranium. Next, a curved line may be drawn down the side of the circle. This curved line will "hold" the features of the face. The chin can be completed by connecting the line with one edge of the circle.
Next, it's time to locate the features.
First, we will need to determine where on the face to put the eyes. This is easy because the eyes are in the middle of the head. Draw a line in the middle of your first shape for the "eye line".
Next, we'll determine where on the face to put the nose. Again, this is easy, because the bottom of the nose will exist on a line exactly in the middle of the eye line and the bottom of the chin.
Finally, we'll add the mouth line. The mouth line fits nicely between the nose line and the bottom of the chin.
Next, you'll need to observe your subject. (Drawing is really all about observation anyway.) You'll need to observe the lines, shapes, and values that exist on your subject. Use your guidelines for the features, but pay close attention to what information exists on your subject. It will take practice to perfect this skill, but that's true for anything that's deemed "worthwhile".
The following video demonstrates how to draw the face in profile or from the side (this is also an older video, but still helpful)...

 If you're wanting to learn even more on drawing faces with HD video and ebooks, be sure to check out the modules that are part of "The Secrets to Drawing Video Course"
Modules 21 - 26 are devoted to drawing faces and include an in-depth look at each of the facial features.
Both male and female subjects are explored.
Each module takes a look at drawing the face from both the side view and the frontal view.
If you're not already a member, and you want to take a sneak peek at what's inside, here's a link to get a free video and ebook from this course...
Here's a link to module 21 on basic facial proportions...
Here are some more art lessons that you may like...