By Matt Fussell
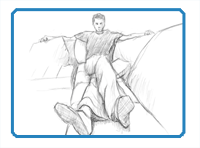
Many consider the human figure to be one of the most challenging subjects in drawing. This is because the human figure has so many nuances that it is hard to find a drawing formula that works for every position in which the body could be. This challenge is intensified when the figure is viewed in perspective. The result is a distortion in figurative relationships or proportion that is referred to as foreshortening.
Drawing accurate foreshortening comes from understanding what happens to the figure when it is in a perspective view. Often this view is created when the figure is viewed from an extreme such as a "worm's eye" view or from a "bird's eye" view. When this happens, a hand or foot can seem very large compared to a head. It can be hard for us as artists, to force the information that we are actually seeing to the surface of the paper. When we see the figure foreshortened, what we think of as proportional goes out the window and we must look at relationships in the body parts of the figure and draw them the way that we actually see them. Doing this may require that we draw the aforementioned foot or hand much larger than we think they ought to be. The same goes for the head.
When we draw a figure normally, it is a good idea to begin with a line from the head to the feet. This will ensure that we get the entire figure on our surface. This should also be the first step when we are drawing a figure that exhibits foreshortening. Only in this case, the line will be shorter. In this tutorial, we are looking at drawing a figure lying down. Naturally, foreshortening will occur here, because we are observing the figure from an extreme perspective. Here's a look at how we should begin our drawing...
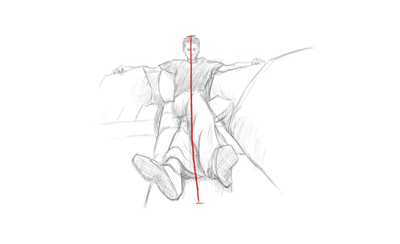
Once the head and feet relationship is defined, we can begin to concentrate on the shoulders and the waist. Now you can draw a line for them both, using the first line as a guide...
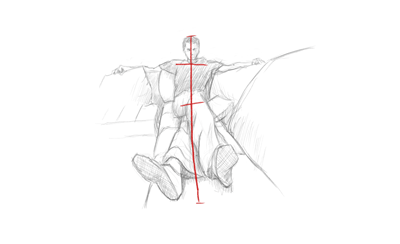
Now, we can simply draw a stick figure to define the bone structure of the figure. I also suggest that you draw simple shapes for the hands and feet. I also like to add small circles for joints...
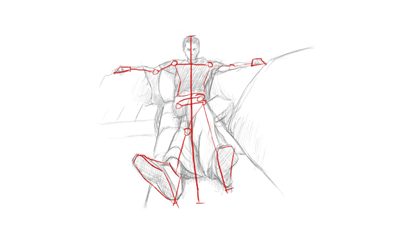
From here, we have enough information to finish the drawing...
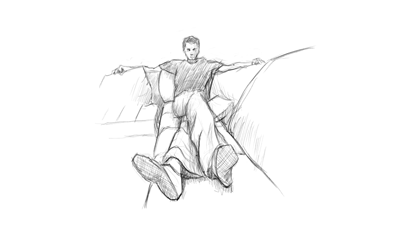
The following video demonstrates this process from start to finish...
Here are some more art lessons that you may like...