

By Matt Fussell
For those that enjoy the painterly marks delivered through traditional pastels, but want the control that comes from using a pencil, you may have just found your medium.
Pastel pencils feature a core made up of traditional soft pastel material encased within a wooden pencil that can be sharpened. Pastel pencils allow the control found in using a pencil but deliver marks that can be layered and blended just as traditional pastels.
Many artists love the marks produced by traditional pastels. They can be used to create painterly effects and gracefully layer to produce rich colors. However, traditional pastels can be tough to control and creating details can be challenge. This is especially true for those of us that are accustomed to drawing with a pencil or a pen.
While some marks will only be produced by using a stick of pastel, artists can regain some control by using pastel pencils, either alone or alongside traditional soft pastels.
Recommended Materials for This Tutorial
Derwent Pastel Pencils

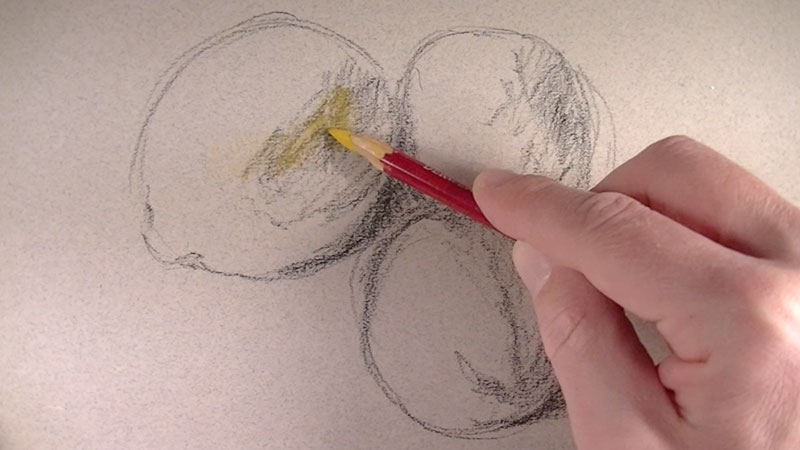
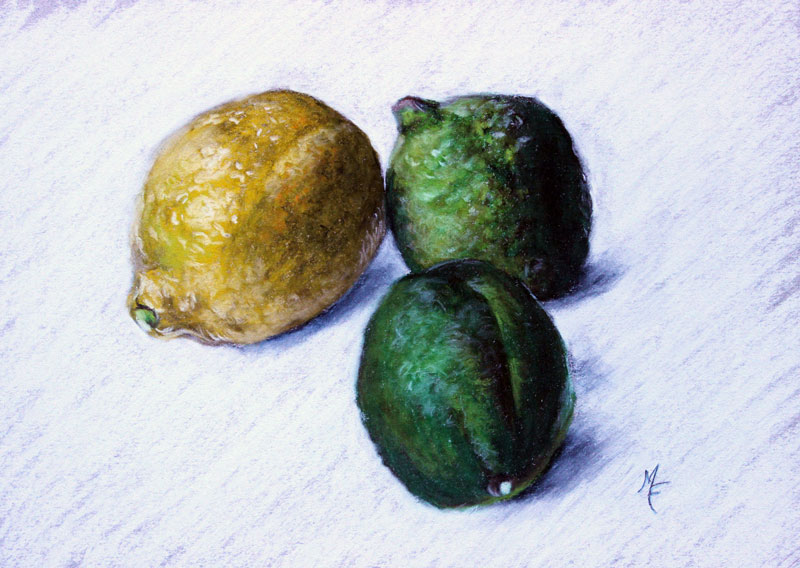
We'll start with a black pastel pencil and draw the contours (outlines) of the objects. We'll also indicate a bit of the core shadow on the objects. Each fruit will be addressed individually, starting with the lemon. Deep Cadmium Yellow is applied using the side of the pastel pencil.
A layer of Dark Umber is applied over the yellow using marks to simulate the texture. Another application of Deep Cadmium Yellow is then layered over the Dark Umber.
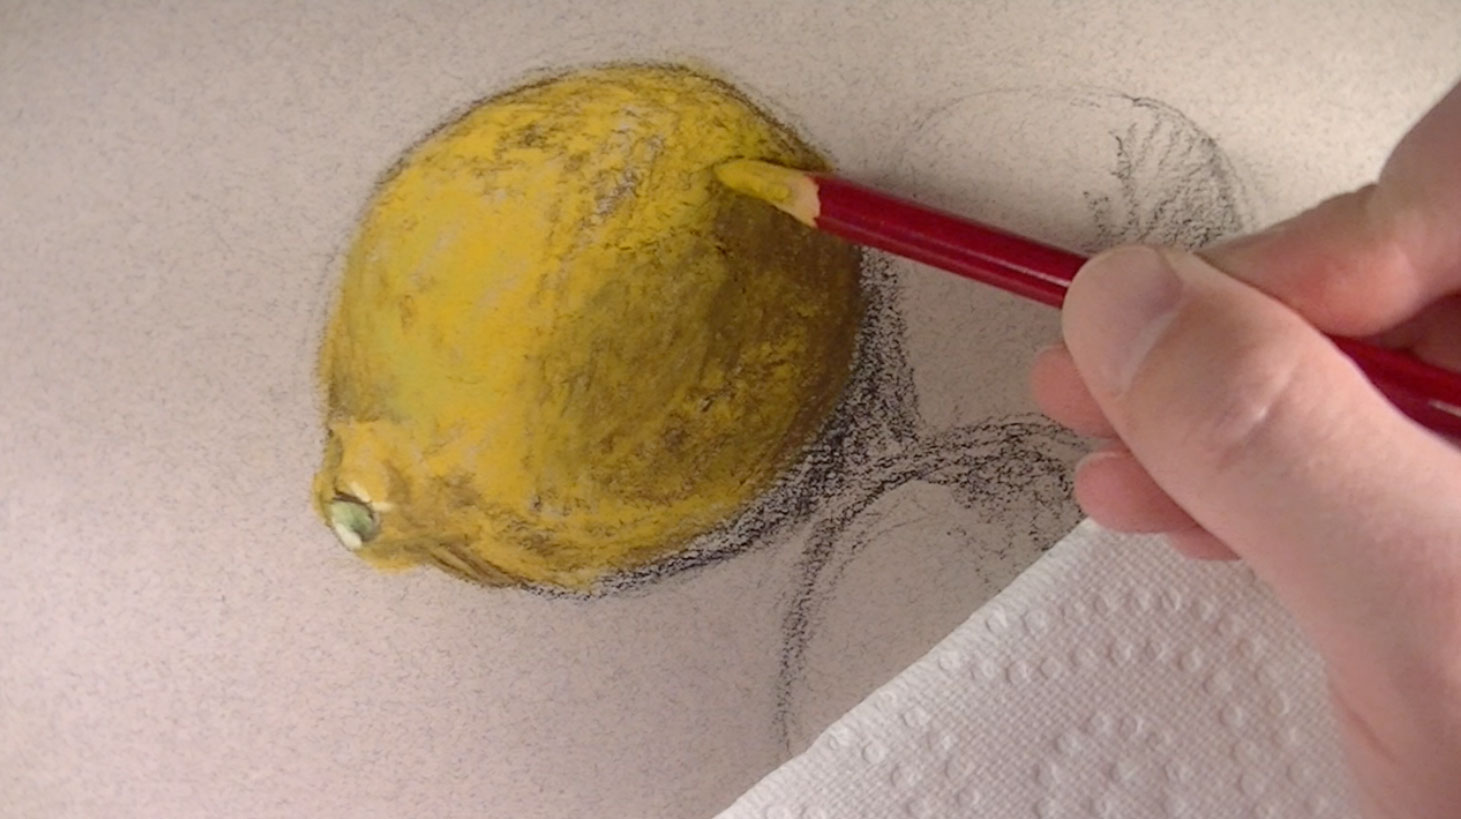
We'll accentuate the texture by increasing the contrast in value. Highlights are added using textural marks with a white pencil.

Next, the first lime is addressed, starting with a layer of Hooker's Green. Dark Umber and light yellow-green are layered in the areas of core shadow and highlight. Again, textural marks are made to help communicate the coarse surface.
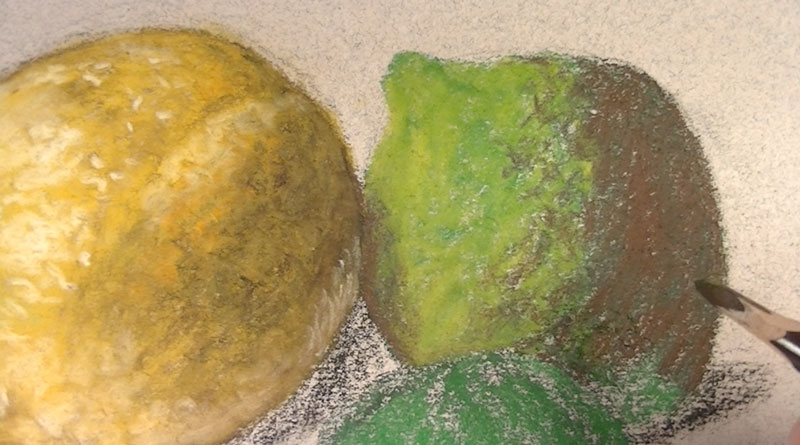
Just as we did on the lemon, a white pastel pencil is used for the areas of highlight on the lime.
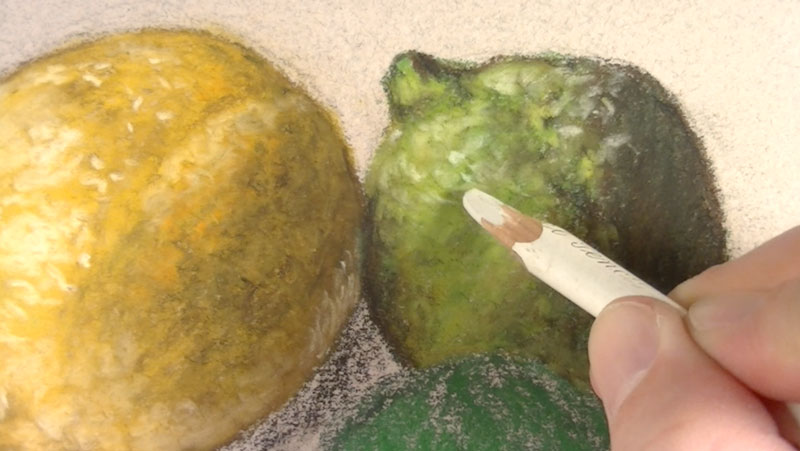
The second lime is addressed using the same progression of applications used on the first.
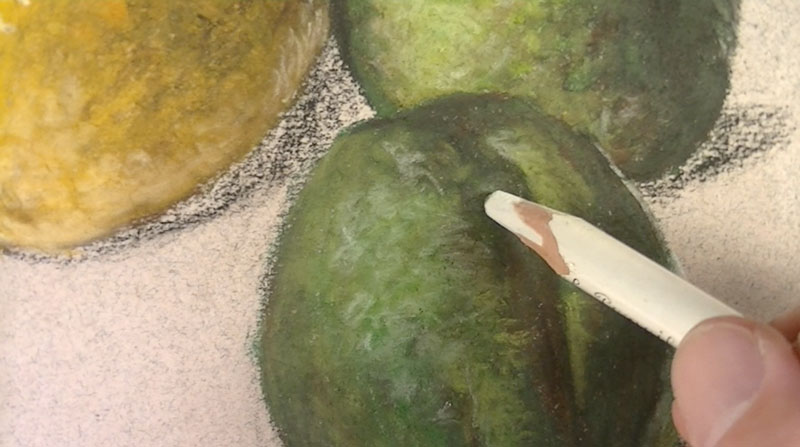
The background is developed with a white pastel pencil using diagonal strokes. Areas of cast shadow are intensified with black and bit of light blue. The shadows are then worked into the surface with an additional application of the white pencil.

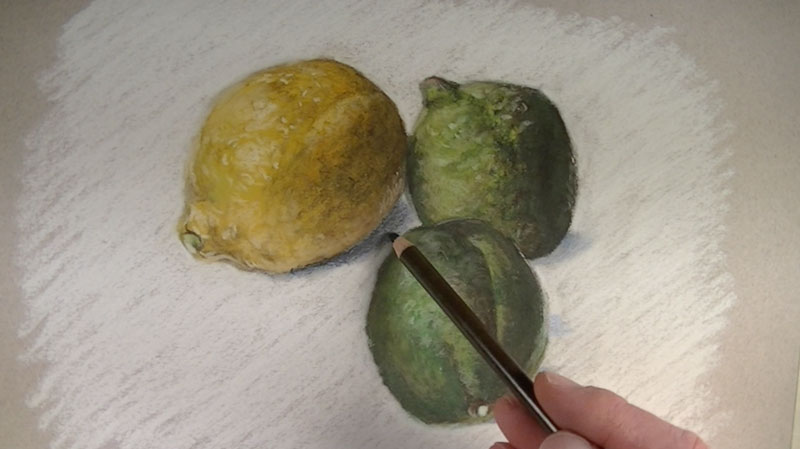
Here's a look at the completed image. It still has the "feel" of a traditional pastel drawing, but the control that you may find with colored pencils.

Here are some more art lessons that you may like...
Pastel Pencil Live Lesson Excerpts - Flower
Colored Pencil Drawing Tutorials
Pastel Drawing Tutorials