By Matt Fussell
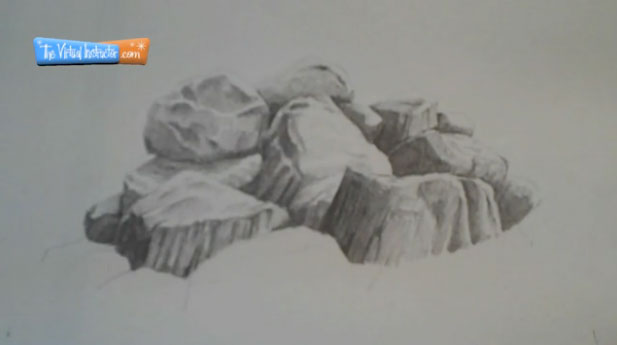
Drawing rocks is really just like drawing anything else. It's a matter of simply looking at what you're drawing, understanding what you are truly seeing, and then putting that information on your paper. In the case of rocks, it's all about recognizing how you see texture.
The key to drawing accurate texture is value. Value is the darkness or lightness of a color. Creating the correct contrast in value will result in realistic rocks. You get the contrast and values right-you get the rocks right. This may mean capturing very subtle changes in value.
Pay special attention to the light source and make sure that is is consistent for all of the elements in the image. Doing this will ensure that your shadows translate properly and create the illusion of the light source in the image. Creating accurate shadows will ensure that your rocks have the illusion of form.
When adding your shadows, try to make marks in a specific direction. Doing this will create subtle lines that will add to the textural qualities of the rocks. It will also aid in creating the illusion of form. These lines will act as cross contour lines.
In order to do all of these things, you must have a reference. Whether that be real rocks in front of you, or a photo reference. It's really difficult to draw anything realistically without looking at it. It would be like taking a photo of something without pointing the camera at it. Therefore, you cannot expect to draw realistic looking rocks without looking at a real rock.
Another bit of advice is to vary your line. Create a range of line quality in the image. On the shadowed side of the rock, use a thicker line. Perhaps use a thin line or even an implied line on the side of the rock that faces the light source.
The steps in this drawing demonstration are illustrated below...
Step 1 - Outline the structure of the rocks by drawing the contour lines.
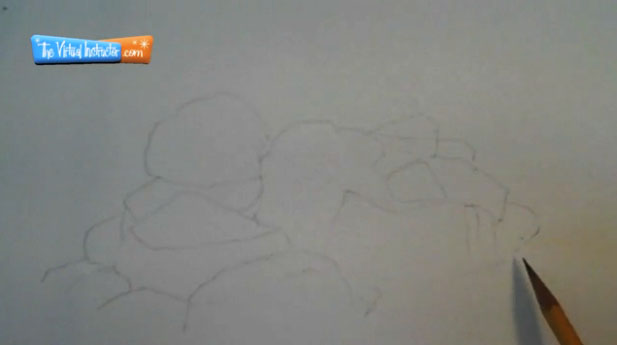
Step 2 -Begin adding the shading on the rocks to create the illusion of light, form, and texture.
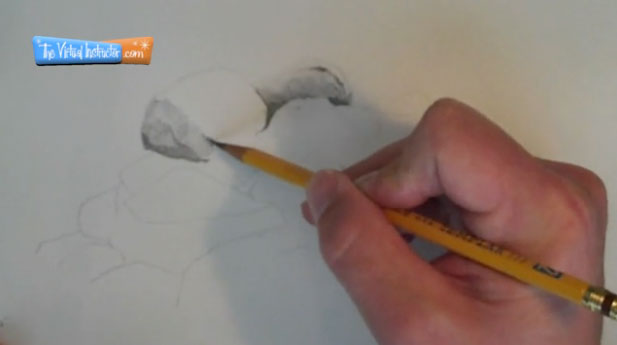
Step 3 - Continue adding a full range of value, working from the upper left down to the lower right to prevent smearing the graphite with your hand.
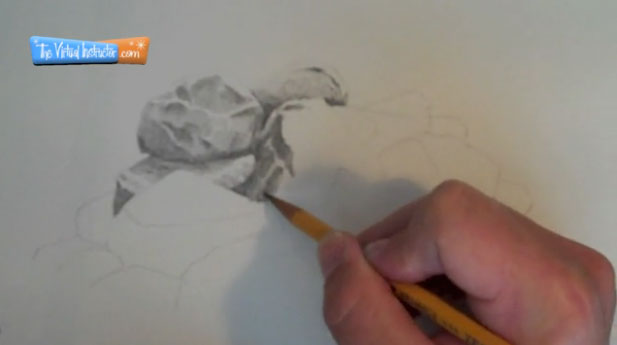
Step 4 - Be sure to make the marks in a consistent direction to help further the illusion of texture.
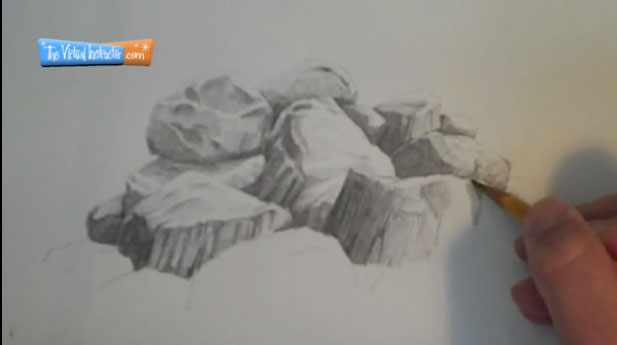
Step 5 - Finish the drawing by adding darker areas with a softer graphite pencil.
