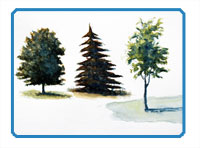
By Matt Fussell
The medium of watercolor is perfect for painting organic subjects such as portraits and landscapes. The water produces complex color mixtures, gradations, and of course, organic shapes. Trees are simply made of organic shapes of color and value.
With a medium like watercolor, it's important not to "over-think" the subject. Details should be allowed to "manifest" themselves by working layers of applications of contrasting values and color temperatures. We shouldn't allow ourselves to become overwhelmed with observed details.
Those of us that are obsessed with details may relate with the saying, "you can't see the forest for the trees". When it comes to painting trees, I think this quote can be amended to read, "you can't see the trees for the leaves."
When we paint a tree from observation, we could become overwhelmed with the amount of detail that is observed. Rather, we should focus on the overall shape of the values and colors on the tree and paint these shapes instead of details such as leaves. Trees are mostly observed as masses of form, instead of a collection of tiny leaves.
Here's an example...
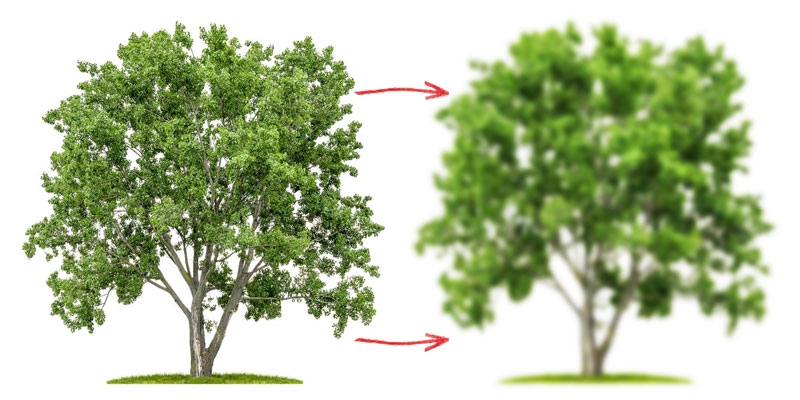
We can clearly see the leaves on the tree in the image on the left. The image on the right, however, is how our mind should "see" the tree in order to paint it. The details are removed, leaving simple shapes of value and color.
We'll go deeper on this concept a little further down the page, but first let's take a look at the demonstration...

Winsor and Newton makes a great field watercolor set
which I'm using in this demonstration. The set consists of 12 pan (or cake) watercolors, a travel brush, 3 tiny, fold out palettes and a small container for holding water. Although it is designed for use on-site, it's perfect in any situation including work in the studio.
The watercolor sketches in this tutorial were completed on Strathmore cold press 140-pound watercolor paper
. This is a great introductory paper to work with. It is excellent for beginners, great for simple "sketches" like these, and inexpensive.
The brush used in this tutorial is Grumbacher's Goldenedge watercolor brush
(size 14, round). This brush is my absolute favorite for painting with watercolor. It is capable of producing clean washes and sharp details without having to load very often.
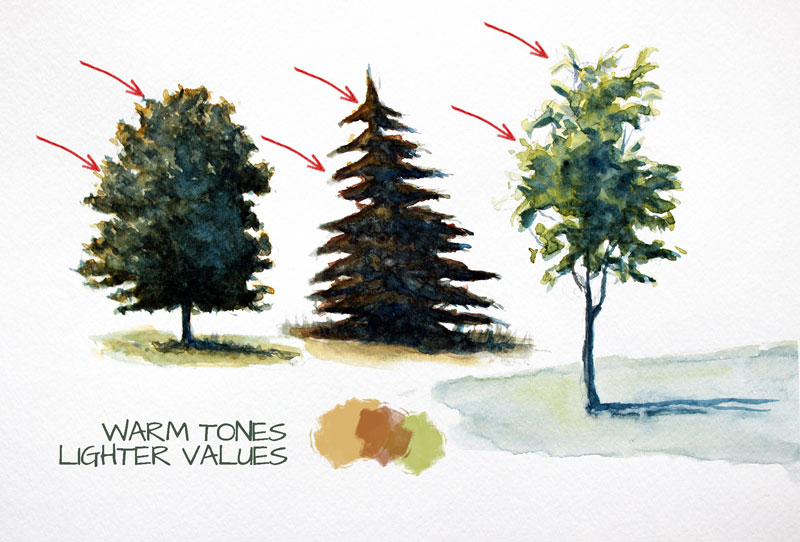
To create the illusion of the form of the trees we'll need to develop the illusion of light in the painting. We'll do this by creating lighter and warmer tones on the sides of the trees that are closest to the light source.
To contrast the lighter and warmer tones, we'll add cooler and darker tones on the opposite sides of the trees. We'll also add these tones in the areas of cast shadow underneath and behind the trees.
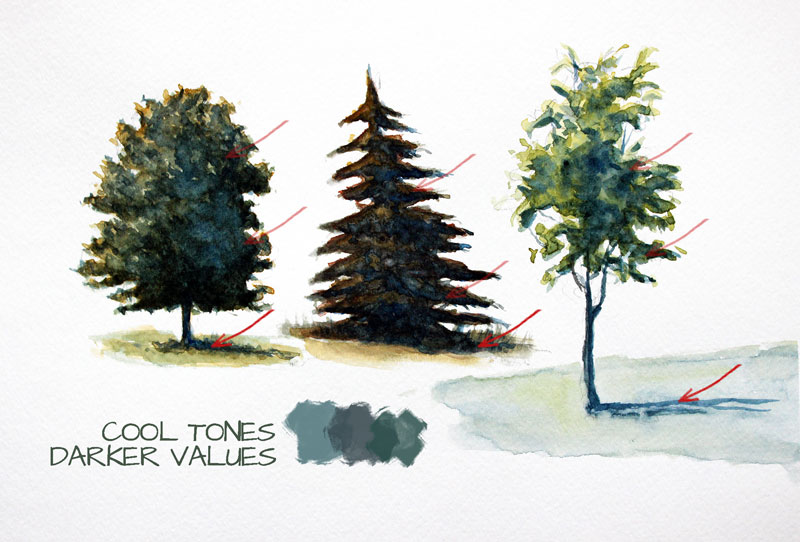
We'll build up these relationships gradually by layering applications, starting with the lighter and warmer tones. And while the surface is still wet, we'll begin to develop the cooler and darker tones. Mixtures of the Yellow Ochre and Winsor Blue will occur in transition areas producing natural greens.
After initial applications have been applied, a darker mixture of Yellow Ochre, Winsor Blue, and a touch of Raw Umber is applied in the areas of shadow.
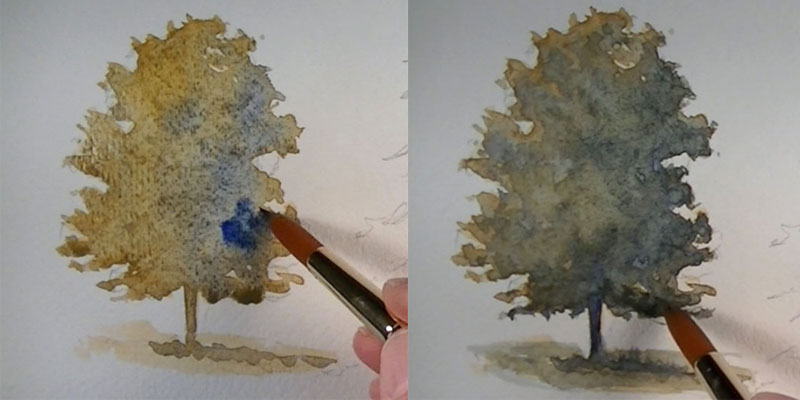
Areas are lifted by adding water and dabbing with a paper towel to create lighter areas for contrast. This is followed by additional applications of the dark green mixture becoming more concentrated with blue.
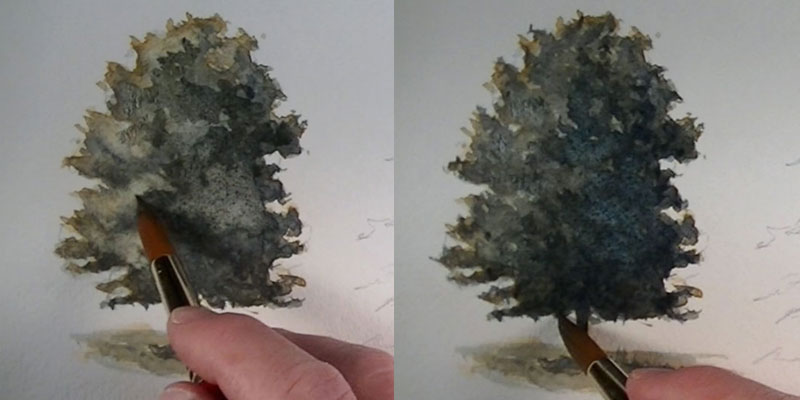
The second tree addressed in the same manner as the first, but the initial wash of color is mixture of Winsor Red and Yellow Ochre as opposed to pure Yellow Ochre. While the surface is still wet, a dark green mixture of Yellow Ochre, Winsor Blue, and Raw Umber is layered in the areas of shadow.
The contrast between light and dark values and warm and cool tones continues with an application of Winsor Blue in the areas of core shadow on the tree.
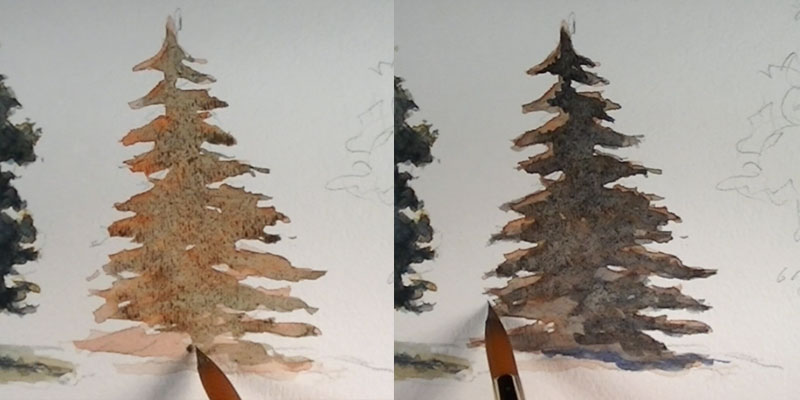
This process continues by applying a heavily pigmented application of Yellow Ochre on the highlighted side of the tree, followed by a heavily pigmented application of Winsor Blue in the areas of shadow.
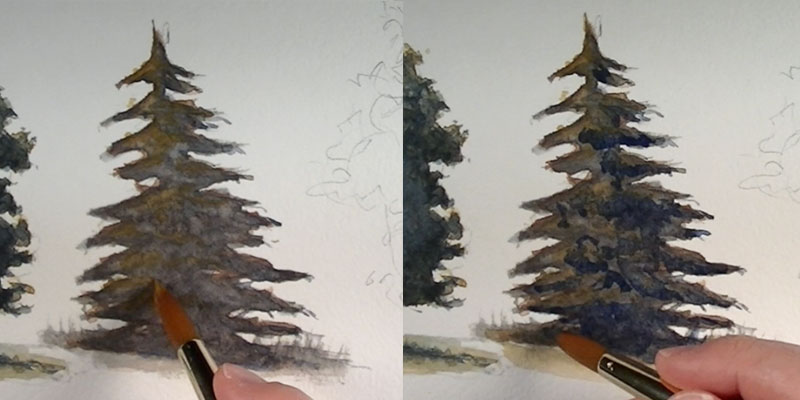
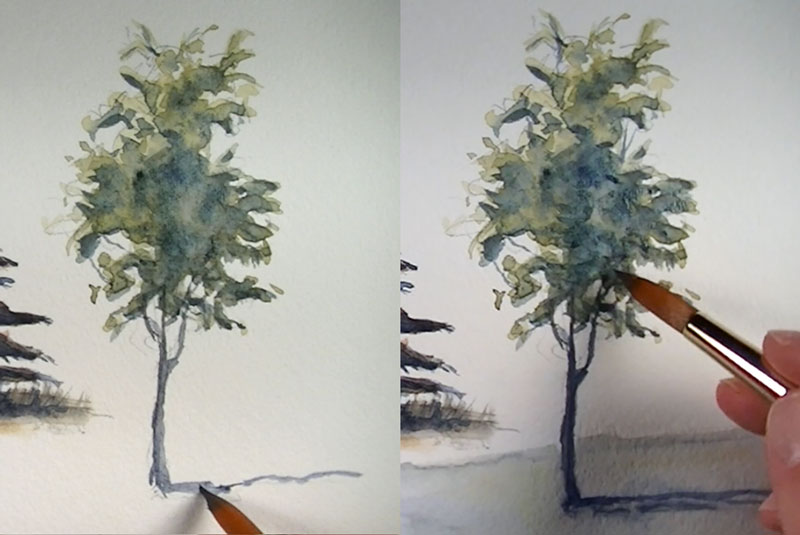
For the third tree, a lighter mixture of Winsor Yellow and Winsor Blue is used for the initial wash. This is followed by an application of Winsor Blue in the locations of core shadow on the tree.

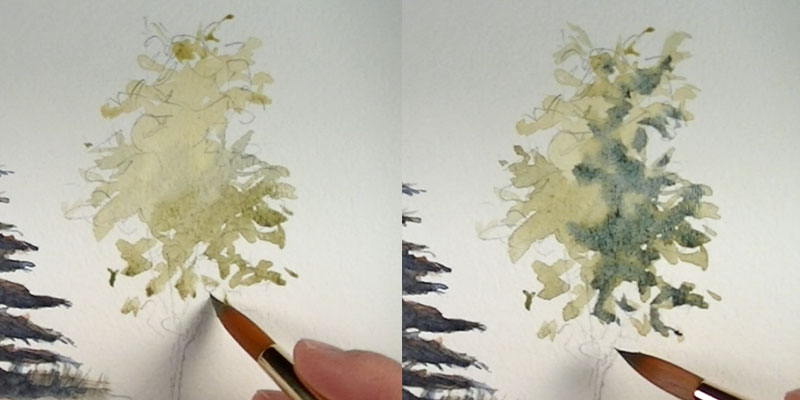
From there, we'll simply continue to increase the contrast between the light and dark values. The cooler mixture of green is used for the trunk and branches of the tree and applied underneath and behind the tree as cast shadow.
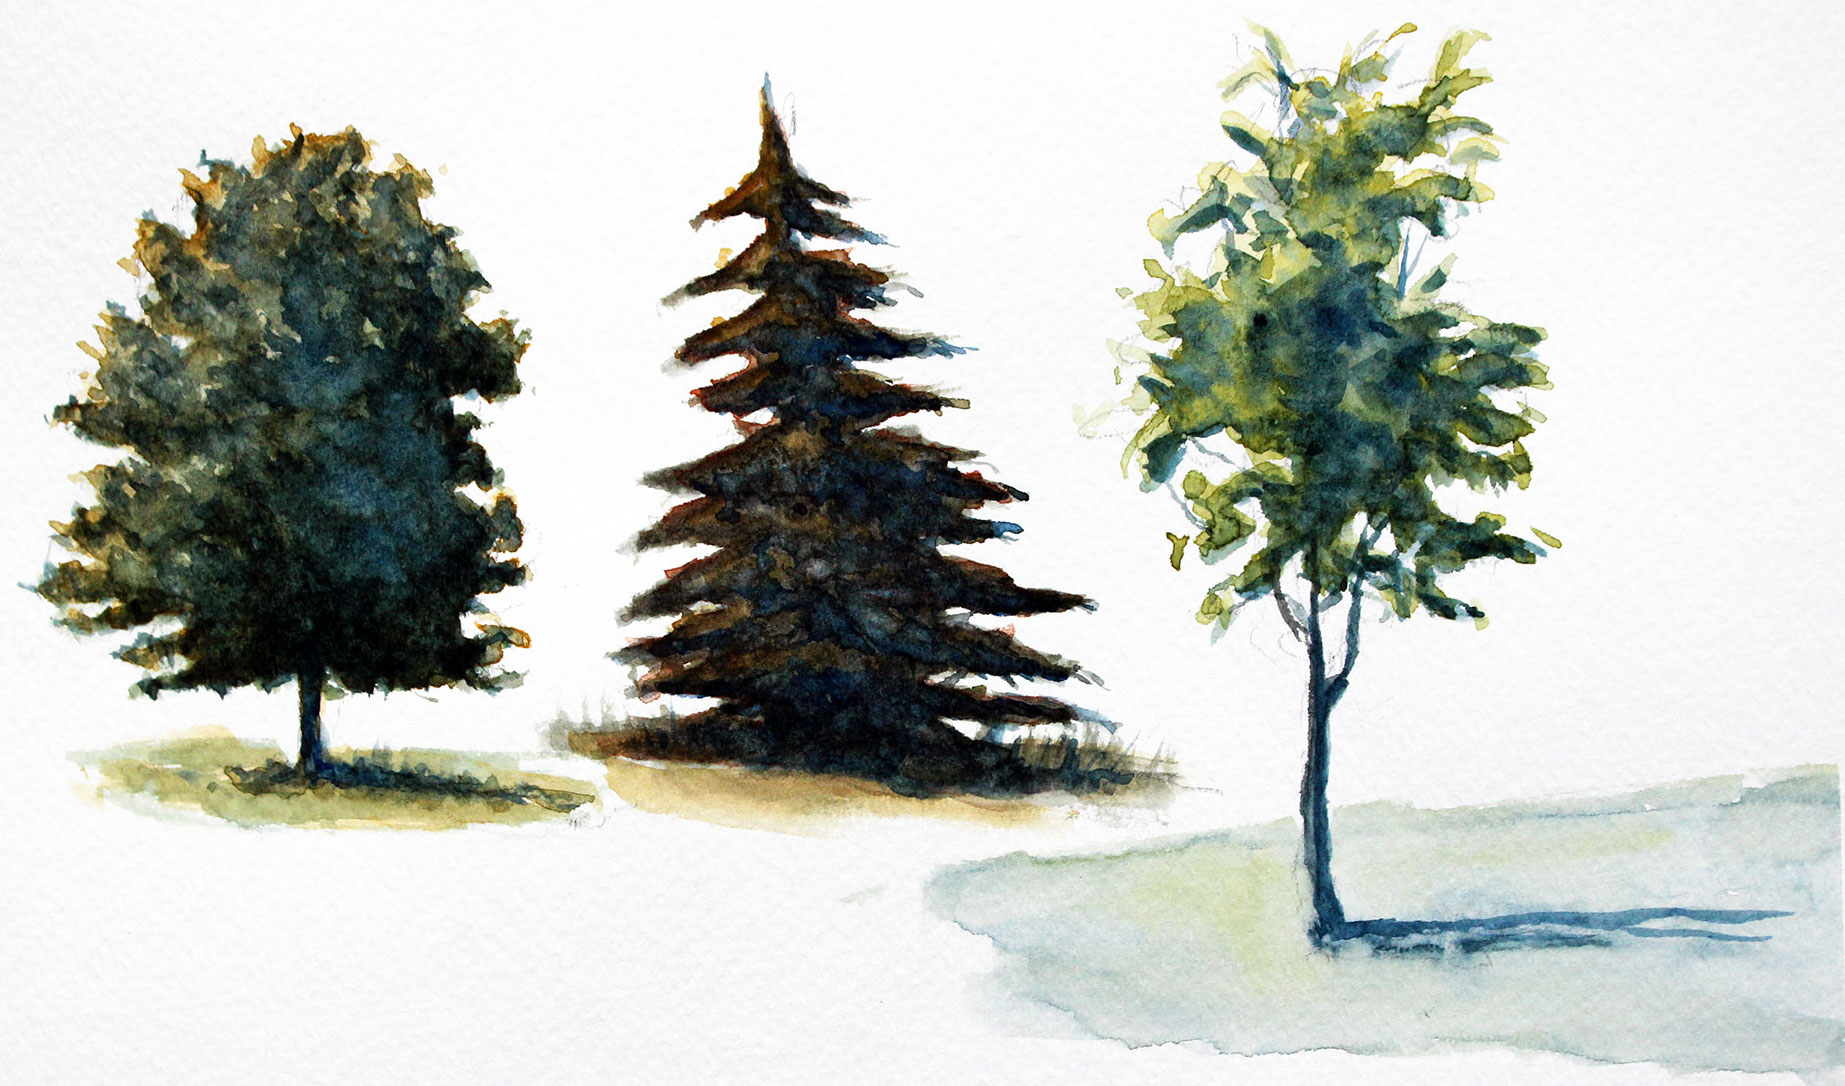
Here's a look at the completed watercolor sketches of the trees...
Here are some more art lessons that you may like...