By Matt Fussell
Pastels are unlike any other drawing media. In fact, they are so unique, finished pastel drawings are often referred to as "paintings". While clearly a drawing media (they are applied dry), the finished result resembles a painting. The thought process of applying pastels is also very similar to that of painting. Colors can be loosely layered in the beginning stages and gradually developed to create details and depth.
Unfortunately, new artists will often begin a pastel drawing and "give up" quickly. Pastels can be difficult to control when they are first applied to the surface. Colors are vibrant and sometimes "unnatural" without proper layering. But with a proper understanding of the nature of medium, anyone can find successful results. It simply requires a bit of patience and practice.
In this lesson, we take a look at one approach to drawing a horse with pastels. A "breakdown" of the process and a look at the materials used can be found under the video, a little further down the page.
As is the case with most art media, the quality of the material that you choose will play a role in the level of success that you achieve. This is true for pastels as well. Higher quality pastels will result in higher quality results.
The range of price of pastels varies greatly. Introductory sets can be acquired for just a few dollars, while "Artist Quality" sets can be quite a bit more expensive.
The good news for artists that are just getting started is that there are introductory sets that are quite affordable. While these introductory sets will not produce the same results that you can expect from "Artist Quality" sets, you can still use them to get fairly consistent results and learn how to use the medium properly.
Introductory Sets for New Pastelists:Professional Sets for High Quality Results:
As mentioned before, pastels require a patient approach to layering colors. The depth of color is developed with each application. As a result, the drawing goes through multiple "versions" as the layers are added.
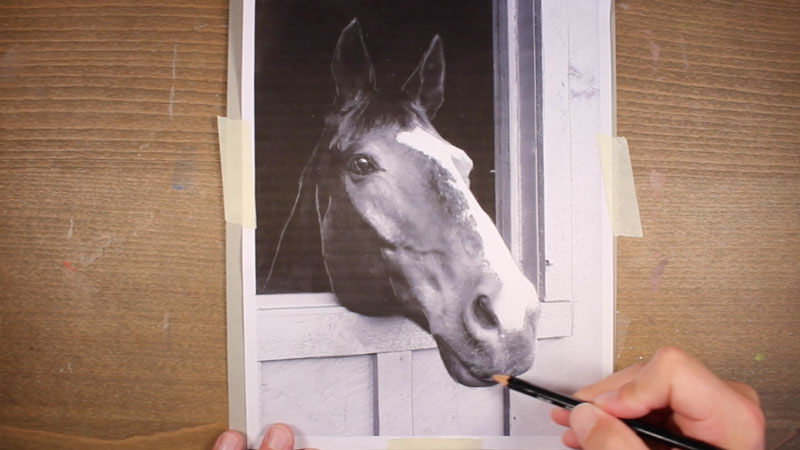
To ensure accuracy, the image is transferred to the drawing surface using a graphite transfer. A soft graphite pencil ("4B") is applied to the back of the print out. The print out is then adhered to the drawing surface with the graphite portion facing the surface. A stronger lead ("2H") pencil is used to trace the lines, transferring the impression to the drawing surface.
Initial colors of the horse are applied and worked into the surface using a finger. Darker tones are addressed with Burnt Umber. Lighter tones are addressed with a light Cream. Mid tones are added with Sienna and Yellow Ochre. Darks are enhanced with black and grays. The drawing is very "loose" at this stage but will become more defined as the process continues.
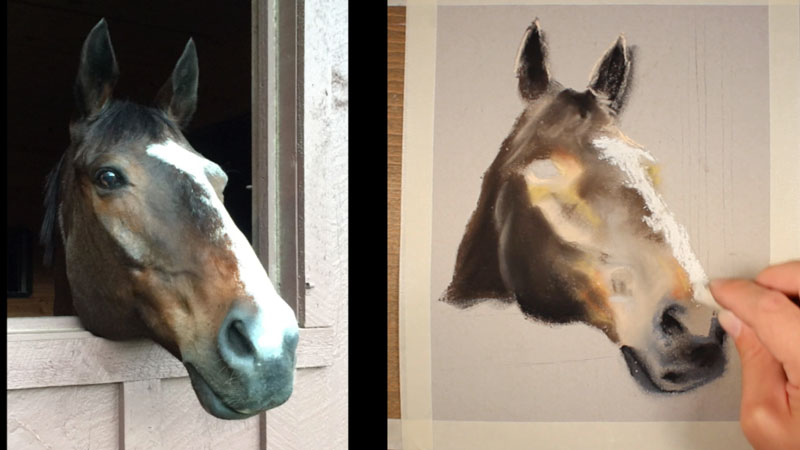
As colors are observed in the photo reference, close "matches" are added in the drawing. While absolute matches are desired, they are not necessary. The most important factor is the value of the color. As long as the darks and lights in the drawing are fairly accurate, the drawing will translate properly.
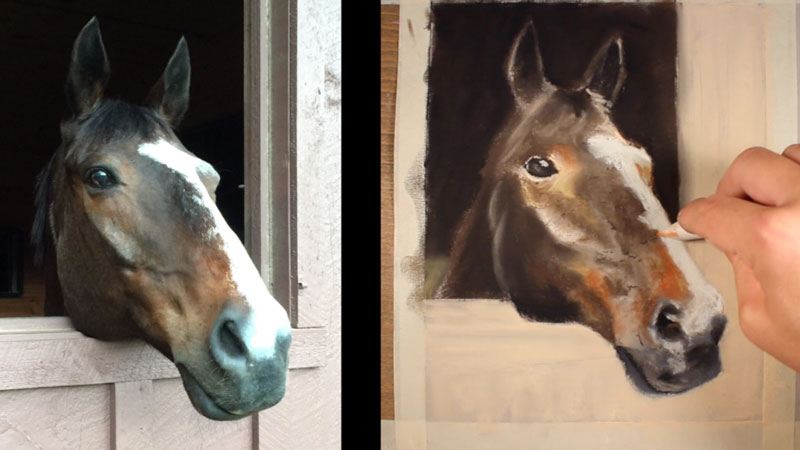
For more precise marks, a pastel pencil is applied, although sparingly. The goal of this drawing is create a "painterly" look. Over use of the pastel pencil can detract from this result. Only a few pastel pencils are used in various locations on the horse head.
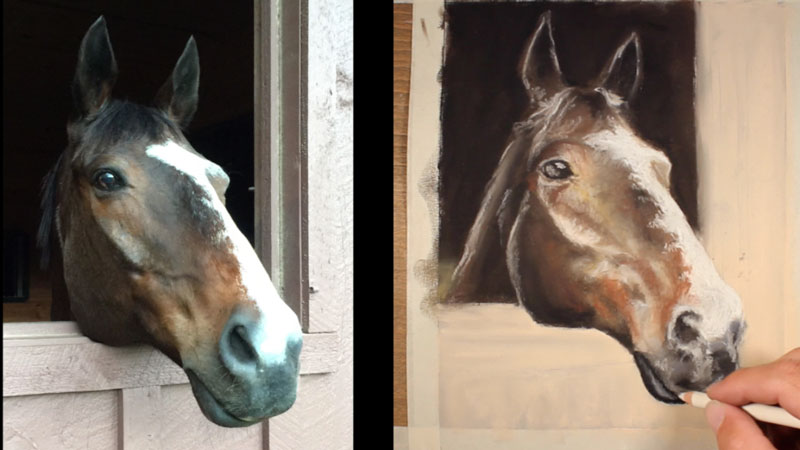
As each layer is applied, it is worked into the surface with a finger or a blending stump. In the early stages, the goal is to create depth in the color. In the later stages, colors can be added without blending in order to create details, strong contrast, and bold colors. While blending is an important part of drawing with pastels, it is not necessary for success. Over-blending can cause a drawing to look blurry or muddied.
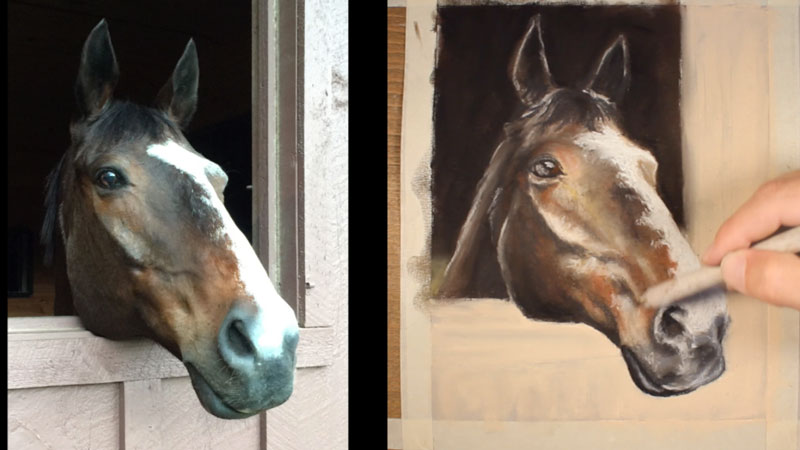
The outside portion of the barn is loosely addressed. The goal is to create more focus on the horse. By clearly defining the horse, while loosely addressing the barn, we can achieve this effect.
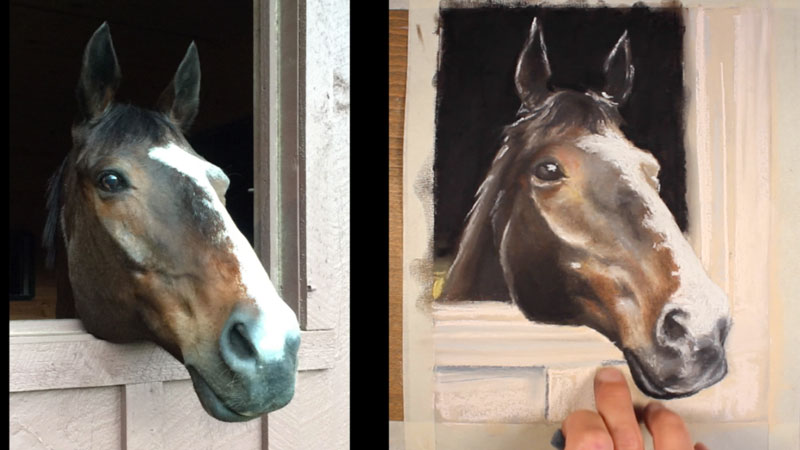
Finally, white is added throughout the drawing to create contrast. White is primarily added to the face of the horse and in the area of highlight in the eye. A bit more black is added around the back and left edge of the horse to create the illusion of the horse emerging from the barn in a more natural manner.
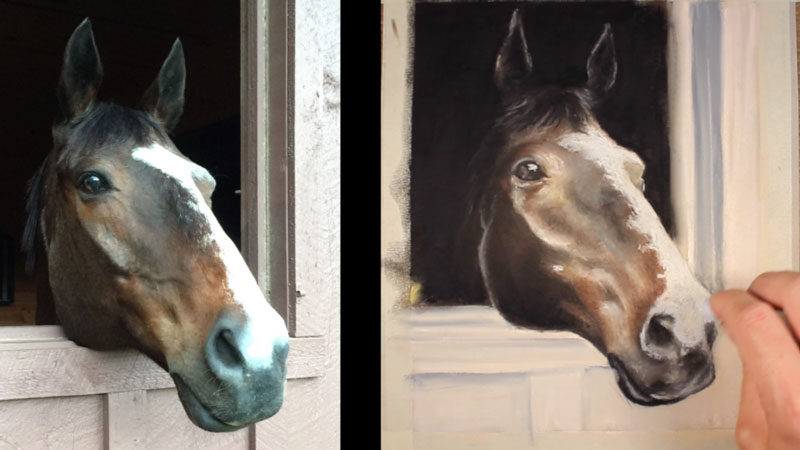
A few final alterations are made to the value within the drawing to accentuate the form of the horse's head.
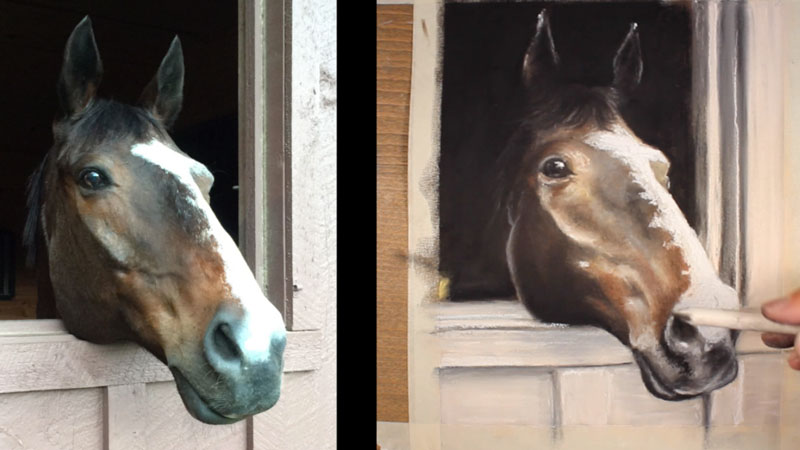
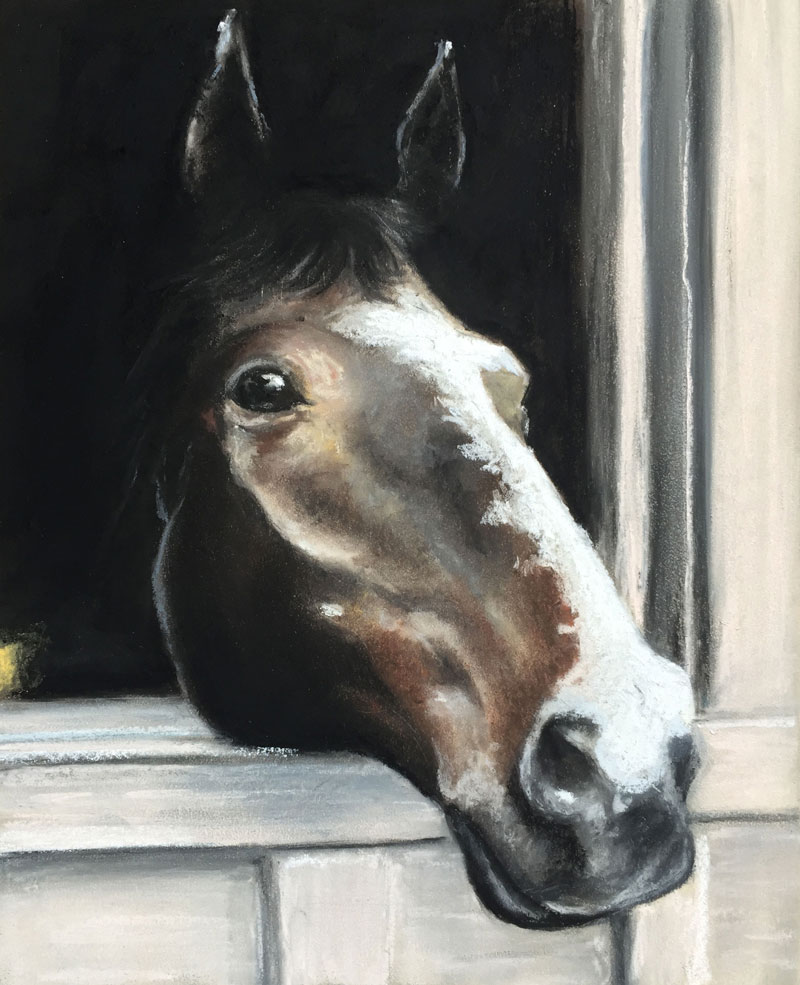
The completed pastel drawing of a horse...
