By Matt Fussell
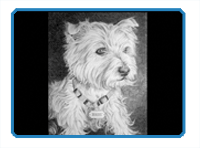
I began by taking a look at the photos that the client provided to get a sense of the personality of the dog and decide which image would translate best as a drawing. I manipulated the chosen photo in Adobe Photoshop by adjusting the values in the image. For example, I made the areas around the dog darker to enhance the contrast and provide more focus on the dog.
Next, I created a grid on my 8" by 10" paper and laid a corresponding grid over the photo in Photoshop. I then worked from the photo to develop a light outline of the dog onto the paper. I then began working on adding value and texture in area around the eyes. I began in this area because I wanted the eyes to be the focal point in the image.
I then worked outward from the eyes to develop the texture and value range of the animal's fur. I was careful to create a full range of value without sacrificing the illusion of white fur. The contrasting value of the negative space helped out quite a bit with this. As I worked, I was careful not smear the graphite. Instead, I adjusted the pressure on the pencil to achieve the value range desired. I also worked with a paper towel under my drawing hand to keep my hand from smearing my work.
Creating drawings on a commission basis can be a rewarding endeavor. I enjoyed creating this drawing for a client. The featured video chronicles the drawing process of a dog in graphite.
Here are some more art lessons that you may like...