By Matt Fussell

For some reason, when it comes to noses, people struggle. It's not hard to draw realistic noses. It's actually really simple. All it takes is four lines and then the rest is adding value. Don't fall into the trap of thinking that drawing noses is hard.
Many people have incorrectly learned how to draw a nose. When you learn something incorrectly, it is even harder to learn how to do it correctly. This is true of anything, not just drawing. Many of us have been taught to draw that "L" shape or perhaps the "w" shape with an extra "u" when we draw a nose.

Drawing noses this way is so far from drawing them realistically. If you are going for a cartoon nose, then that may be a good direction to go. But for a realistic nose, you must really observe your subject.
You must really observe your subject when you draw anything. Drawing noses realistically involves closely studying the values. The values are what gives us the impression and illusion of the form. Make sure that you include a full range of value when you draw a nose.
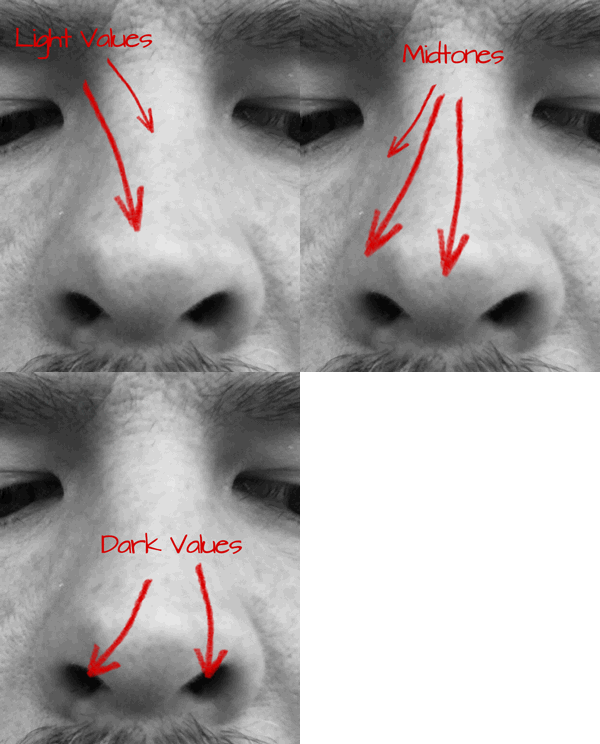 Drawing lines will help to establish the shape of the nose, but it's the values that will lead to the illusion of form that you probably want in you drawing.
Your drawing must include the darkest shades and the lightest tints and the grays in between. Keep in mind that no two noses will be the same. Observation is really the biggest secret when it comes to drawing.
Try to pinpoint the locations on the nose where these values are located and notice the subtle changes that happen in the highlights (light values), midtones (middle values), and the shadows (dark values).
The second video art lesson shows how to draw realistic noses. This video is a bit old, but still helpful for starting out drawing a realistic nose (Many of the concepts in the first video are also laid out here). Once you've got these concepts down, it's time to step up your game a little further down the page...
Here's the process outlined in the above video, just broken down into a step by step approach...
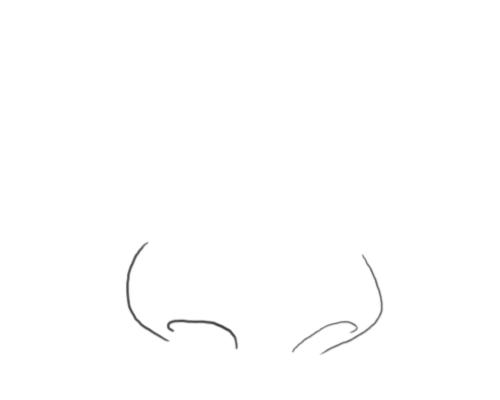
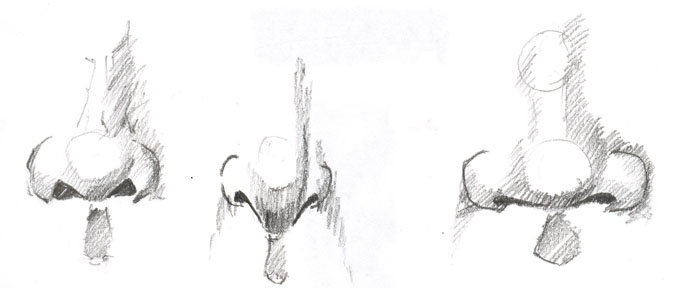
Begin your drawing of a nose by drawing four lines. 2 lines for each nostril and then 2 lines for each edge of the nose.
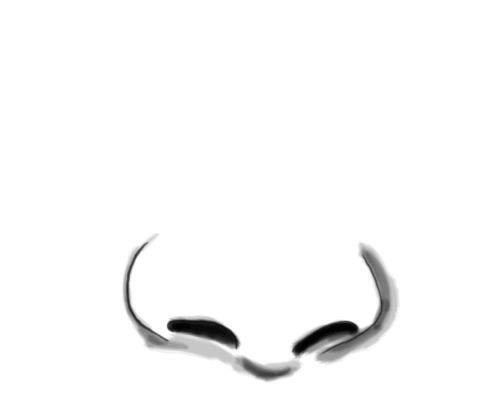
Now you can begin to add darker values where the nose is shaded. Start with the areas that are the darkest and slowly get darker with your pencil.
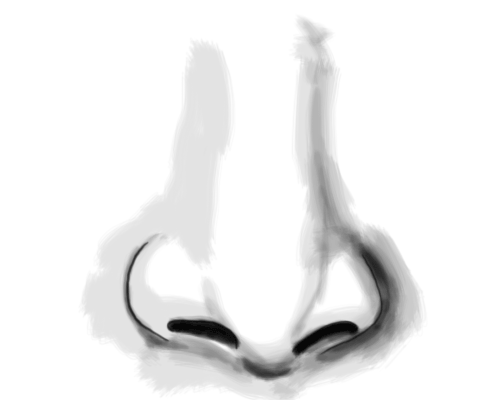
Continue with adding shading to the nose to create the illusion of a light source. Be careful not add more lines. Instead just concentrate on light and dark areas.
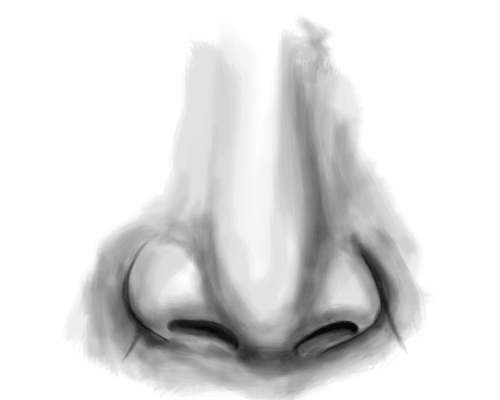
The more value that you add, the more your nose will look realistic. Areas of the nose that are light will look like they protrude, while areas that are dark will look like they go back in space.
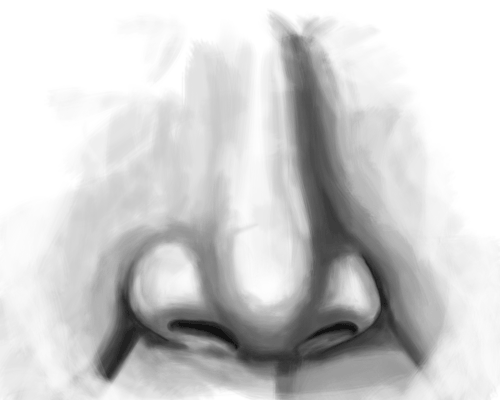
As long as you keep looking for the dark and light areas on the nose, and draw what you see, your nose will look realistic.
Once you have a basic idea of how to draw a nose from a frontal view, it's time to look at drawing a nose from the side.
There's more than one way to draw a nose. In fact, since every nose is different, there are virtually unlimited ways to draw a nose. Unfortunately, this can lead to mistakes when it comes to drawing them.
Another characteristic of noses that gives some people problems is the lack of lines inherent in noses. A mouth, eyes and even ears all have clear linear qualities that are easy to pick out when you are drawing them. A nose, however, is another story. There are actually only a couple of lines that are easily seen on a nose. Instead, a nose consists of gradations of values. Every part of the nose that recedes will be darker in value, while the areas that protrude will be lighter. Getting this right will result in a realistic-looking eye.
Although there is no formula for drawing noses, there is an order that you can focus your observation when drawing noses.
The third video demonstrates how to draw a nose from the side view.
Now that you've got the basic concept down, it's time to take your skills to a actual subject. This might be a nose that you draw from life, or one that you draw from a photo reference. Either way, the process of drawing will heavily depend on observation.
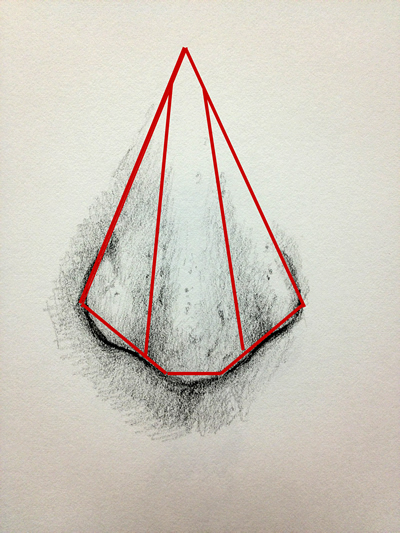
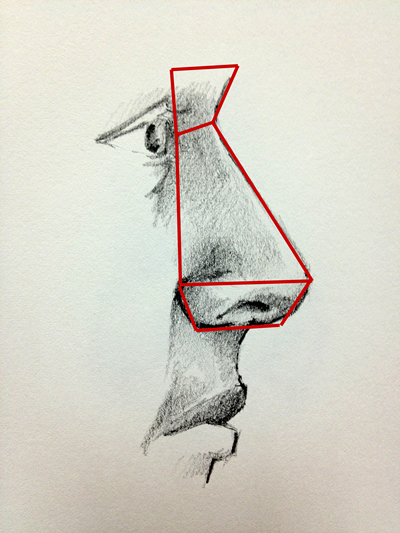
When you are observing a nose, it's helpful to know what you should be looking for. I like to look for "planes" - or simple geometric shapes that represent how the nose exists in space.
By drawing the planes, you can piece together the form.
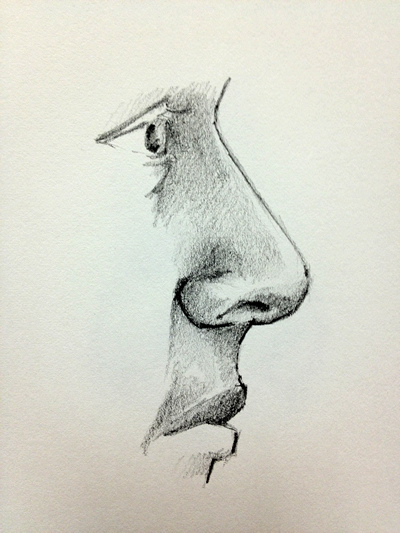
Take the following drawing for example...
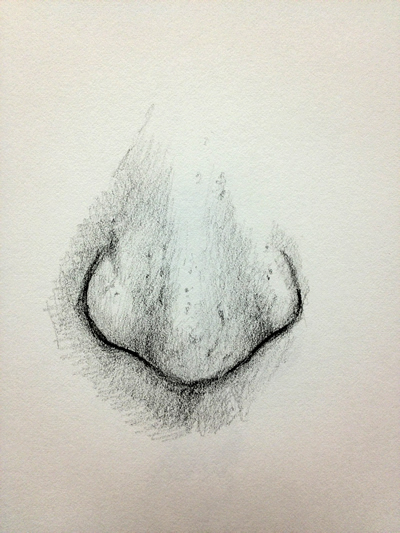
Now look at the planes that can be easily drawn to create the form of the nose...
Here's another look at the nose from the side view.
Here is the same drawing with the planes highlighted...
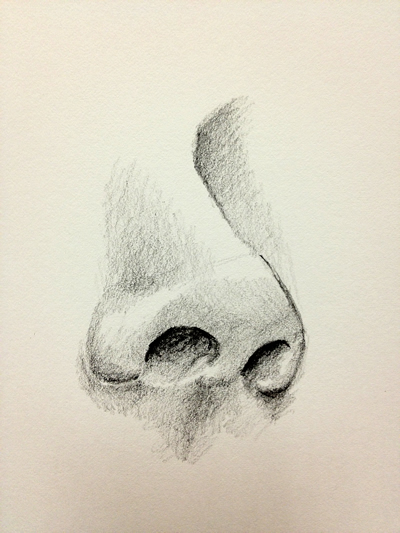
Certain angles of the nose can present challenges...
But here again, if you break the nose down into geometric planes, this angle is made easier to draw...
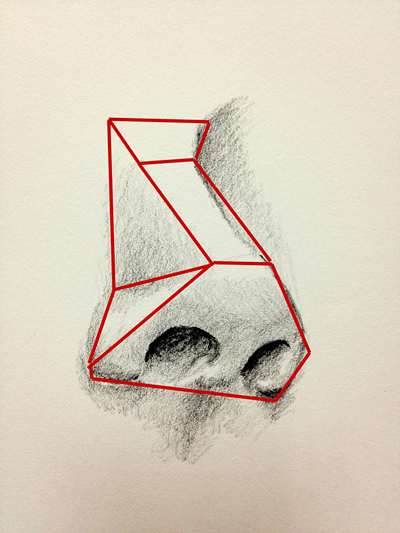
Finding these planes and drawing them first will help you fill in the values that will lead to the realistic illusion of a nose.
The concepts that have been explored so far all center on drawing with black and white media, such as charcoal or graphite (pencil). But what happens when another medium - or specifically a color medium, is used to draw a nose. Does anything change?
Well, actually the answer is "yes" and "no".
When color is introduced, it must be addressed, but the concepts of adding the value do not change. I have already explored how to approach drawing a nose with colored pencils in another video. Since it is a little bit more in depth, it has its own page. You can check it out below...
 If you're wanting to go even deeper on the concept of drawing noses, be sure to check out module 23 in "The Secrets to Drawing Video Course".
This module is devoted to drawing the nose (and the mouth) in a detailed approach through a HD video and eBook.
If you're not already a member, and you want to take a sneak peek at what's inside, here's a link to get a free video and ebook from this course...
Here's a link to module 23 on drawing the nose and the mouth...
Don't forget that noses come in all shapes and sizes and the best way to draw one is by observing the lines, shapes, and values that make them up.
Here are some more art lessons that you may like...